Let’s assume you know the basics about Avatar: Pandora Rising, the Na’vi and RDA Commanders, Commander types, how to build a basic deck, buildings upgrades, troops to level. How do you get powerful without breaking the bank or even spending at all? These tips will help put you on the radar and build up fast within 7-10 days in Avatar: Pandora Rising.
Shop
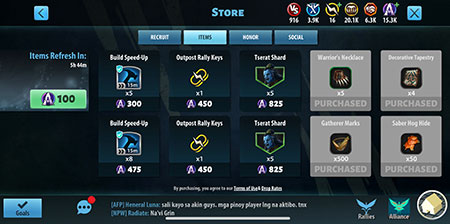 The Shop icon followed by the “Items” tab there will be four items for sale, for either Woodsprites or credits (depending on your faction), BUY THEM! You may think you don’t need them but you do and they do not become trivial anytime soon. Note that the bottom, right item is typically the one you will need the least.
The “Social” tab should also be checked to spend some Versus (VS) or Alliance credits. Both VS and Alliance credits can get you shards for troops and valuable resources. You don’t have to buy from the Social store tab, but it definitely helps, and using your Versus currency is wise since it can be taken away from attacks on your base.
Supply Docks
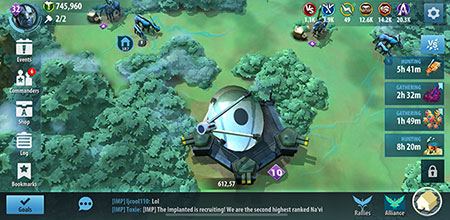
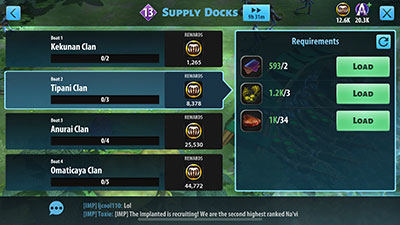 Located in the bottom righthand corner of your Village screen, your Supply Docks allow you to ship supplies to other Na’vi clans in exchange for Woodsprites. I recommend that you use your Supply Docks as often as possible to get as many credits/Woodsprites and Experience (XP) as possible. If you have a storage area (aka Supply Shelter for the Na’vi), make sure you know exactly how much is protected and shield if you need to protect what you have earned. Your enemies can take away Woodsprites and Versus credits from attacking your base, so keep this in mind at all times, and always check these numbers at the end of each day.
Stamina
If you are not using stamina you’ll fall behind quickly. PvE battles will get you some XP, resources and a few marks and other items. PvP battles within your level-range will get you much needed*VS credits, any exposed loot not protected by their storage and other items as well as well as great player experience.
Outpost Raids
 You should be running Outpost Raids everyday as these are fantastic for getting resources needed to advance your troops and commanders. The suggested minimum is 3 Outpost Raids per day, but you need to fight in at least one to satisfy the daily goals. Remember to watch for Outpost tokens in the Shop if you get low on them.
PvP
If you don’t PvP (Player vs Player), you’re doing it wrong. Avatar is a movie where one faction (RDA) fights another faction (Na’vi) over resources and land. If you have not seen the movie, spoiler alert, there wasn’t hugging and handholding at the end. Targeting the opposite faction is generally okay but understand what takes place when you attack someone – that person will probably be upset and wait for the day your shield is down and your resources are exposed to attack you. Attacking also makes your entire alliance open to attacks. All of that being said the Versus credits can power you up quickly, save massive time on gathering, help boost troops, commanders and overall make you stronger in a short amount of time.
After you PvP, in most cases, your shields will be down for 2 hours. You will either have to hide on the map or ask your alliance to reinforce you. Keep in mind that is 2 hours they can’t harvest, farm or PvP with that command slot so it is a big request. Spending your Woodsprites and Versus credits is a great way to get around this – just enough for your storage to keep the rest under lock and key.
Player Levels
Player Levels themselves do not seem to do much currently, but they do give valuable rewards and much needed building speed-ups when you achieve them. You can grind early levels at the Supply Docks in your base and plow through the early Levels with PvE (Player vs Environment) and PvP battles.
Set Alarms
Setting alarms and reminders the first 7 days of game play is recommended for highly competitive players. If you want to be casual and uncompetitive you probably wouldn’t have read this far. When a building completes an upgrade, do another. When a Rally is complete, go again. After 7 days you should be around Village Hall 8-10 and your timers will be a lot longer which will drastically slow things down.
If you have a shield up, you are obviously protecting resources. You cannot be “zeroed out” like in similar games like Game of War, but it is annoying when you thought you had enough resources saved to upgrade as soon as you wake up only to find that your shield was down and someone stole most or all of your Woodsprites and Versus credits. So set an alarm if you want to save yourself some headaches.
That is it, basic, simple, easy….okay, maybe not “easy” but doable and all with 7-10 days.
By Bloodbrew of The Implanted
Reviewed y LJ, August 2020