A new Objective is in – Search for Compass on Koboh. The compass is to help navigate the Abyss and seems to be the main objective in this game – maybe it will even fill in where Cal is during the events of Kenobi, Rogue One, A New Hope and more. Of course the planet Koboh is no stranger in this game having spent a lot of time on it already.
When you arrive back on Koboh we find out that the Bedlam Raiders have kidnapped the High Republic droid Zee.
Rescue Zee from the Lecrehulk
One option to get closer to our destination is to Quick Travel to the Devastated Settlement through the meditation circles. We are going to instead travel on foot and we set out around the Untamed Downs, past the Boiling Bluff and ahead toward the Devastated Settlement section of the map. We fight beasts along the way for the XP and run into some BX droids.
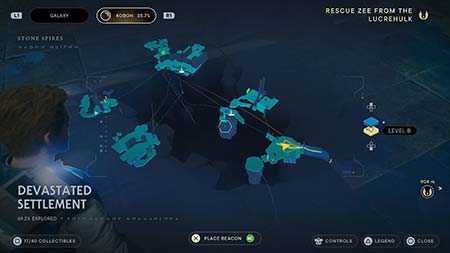 In the Devastated Settlement we head to the yellow arrow on the map in the screenshot. Jump through the green laser gate and start exploring. We squeeze through a wall and Bode joins in with his jetpack. After the dialogue you glide into the Viscid Bog and explore some more. You come across a shelter and the ladies give you a task to find a missing Datapad. If you jump under the island there tunnels and a zip line that leads you to a tower that you can climb to explore more of the area.
There are chances to talk to Bode a bit more and the history on Bracca is one of the topic that can be discussed.
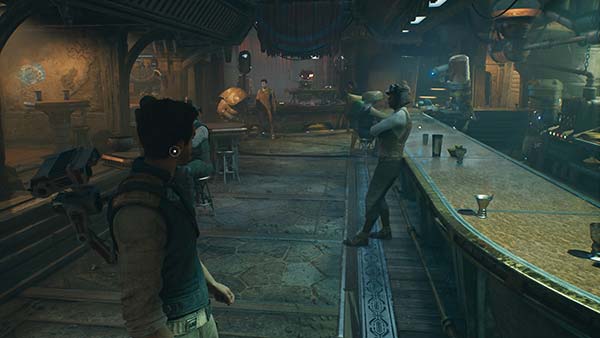
At one point you will force from the ceiling and do two wall jumps into a green laser gate into a room where you defeat enemies and have to time another laser gate with your parkour jumps. After unlocking a shortcut, a Magnaguard puts up a good battle. More crazy jumps and use of the grappling hook and eventually you come to the Loading Gantry where more droids make things difficult. Progressing forward, another dash through a laser gate and you face two Bedlam Raiders and a B2 droid in the Hangar Rafters. Hacking the B2 is super helpful here as Mustafar Nathan plays the walkthroughs on Jedi Knight difficulty and this is very, very tough. When you defeat these three you have Bode fighting a Magnaguard who you need to finish off.
You get to a room called the Lecrehulk Core and spy on the Separatist Droids and their captive, Zee. Bode splits off and we jump through more laser gates and take an elevator down to the Core where Bode sets off a big explosion. Save at the meditation circle and prepare for a seemingly big battle. Down a ramp and around a corner and we fine a Force echo, then more exploration to find another Droideka and more areas to explore, only now with lasers turrets above. Some navigation through here and a Bedlam Raider with a huge electro hammer of sorts is your opponent in an open area, but Bode comes along during the fight to help finish him off. Head back out to find the hanging train cars and hear and run off of the train, jump off of it and grapple to safety.
We reach the Yurt Barracks and there are a lot of enemies to fight. Bode proves to be quite helpful and after we defeat a couple of units of droid we find a crate we cannot open and then work on a computer terminal when Bode brings up Merrin again. A white laser gate separates the two and they have to split up once again as Cal starts to explore. As we so crawling through the walls Cal is attacked by Rayvis himself and then a big fall ensues. Glide down the wall with your lightsaber and the laser to turrets force you to take cover and a cutscene with Cere teaches you how to deal with the turrets moving forward with a Force slam.
Throughout the map you continue to work around a meditation circle in the Lecrehulk Core but follow paths all around it, eventually opening a shortcut to the same circle to save your progress.
Cal grapples to the top and eventually looks down over Dagan Gera talking to Rayvis and they command a minion to activate the Forest Array. Sagan says he will reprogram Zee and the cut scene ends.
Back at it, Cal continues to navigate to Forward Control Tower and we save at the meditation circle. A battle seems close and we find Zee trapped and Dagan Gera confronts us. Dagan threatens Cal and the #OneArmedJedi attacks. Some acrobatic moves and the boss battle ensues. Our complete breakdown of the Cal Kestis battle with Dagan Gera breakdown in Jedi Master mode will be added soon. After you “defeat” Dagan Gera, Bode saves Cal and everyone escapes with the good guys getting Zee as well. A Health Essence after the battle enhances your Max Health and we move on. It seems the Shattered Moon is once again our destination, but first you climb into an escape pod and head back to the Viscid Bog.