The Geonosian Territory Battles were launched in June 2019 starting with with the Dark Side battles, officially named Geonosis: Separatist Might and then followed by Geonosis: Republic Offensive on the Light Side in December.
The Geonosis: Republic Offensive Territory Battle features four Phases which, at least at the start, last 36 hours each. Each of the four Phases of the event has a Special Mission rewarding Mk II Guild Event Tokens in Phases 1, 2 and 4 and Ki-Adi-Mundi shards in Phase 3.
The following is a Walkthrough of my experiences in Phase 2 that will be updated over time. Phase 2 has two Combat Missions and a Special Mission, with one of the Combat Missions requiring 7-star, 21,000+ power Jedi. Below is what I used on this specific mission
Phase 2 (South) Jedi Combat Mission Requirements:
- Minimum 7-star characters, 21,000+ Power
- Jedi
My Roster of Jedi Heroes:
- Jedi Knight Revan – 27,129 power – 7-stars – Gear 12 +5 – Six 6-dot mods (Offense & CC sets) – all abilities maxed, 285 speed
- Bastila Shan – 22,692 power – 7-stars – Gear 12 +5 – Five 6-dot mods & 1 Gold, 5-dot mod (Offense & Health sets) – all abilities maxed, 244 speed
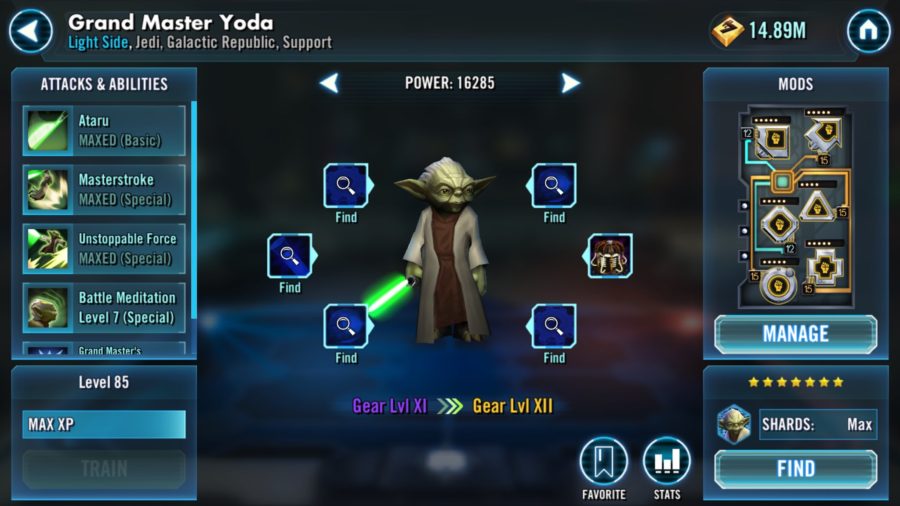
- Grand Master Yoda – 25,399 power – 7-stars – Gear 13, Relic 4 – Five 6-dot mods & 1 Gold, 5-dot mod (CD & CC sets) – all abilities maxed (except leader ability), 288 speed
- Jolee Bindo – 30,042 power – Gear 13, Relic 7 – 7-stars – Four 6-dot mods & 2 Gold, 5-dot mods (Health, Defense & Tenacity sets) – all abilities maxed, 229 speed
- Hermit Yoda – 21,003 power – 7-stars – Gear 12 + 3 – One 6-dot mod, two gold, two purple & 1 blue, 5-dot mods (Speed & Health sets) – all abilities maxed except Do or Do Not unique, 280 speed
Phase 2 (South) Jedi Combat Mission Battle Notes:
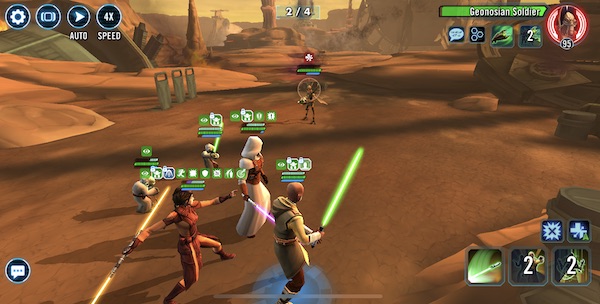
12.20.19 – I start off working to remove B2 only to take a ton of big hits, JKR and Bastila are dead right away. I used Master’s Training from Yoda on Jolee to keep his defense up. Killed off the B1, then lost GMY before Jolee revived all Jedi. Used JKR to focus all attacks on a Geonosian Spy and killed it but lost JKR again. GMY removed turn meter on the other Geo Spy then Bastila stunned him, then Jolee revives JKR again. Bad RNG/setup on my part as Geo Spy was still alive and assisted an enemy attack to immediately kill off JKR nullifying my efforts. Trying to make the battle last as long as possible with basic attacks, I stun the Geo Soldier and use basic attacks until Jolee gets another turn to revive JKR. I remove turn meter on the enemy and stun him again to complete this first wave.
The second wave of enemies features a B2, two Geo Soldiers, a Geo Spy and a BX-series Commando Droid. I focus all attacks on the B2 to remove him before he takes a single turn (JKR’s target and GMY’s double attacks from his basic), then use the AT-TE to weaken the group. Bastila stuns the Commando droid then a Spy kills JKR. Having a solid Relic on Jedi Knight Revan would be a HUGE help for his survivability in this battle. I begin to focus attacks on the Spy and have him at about 60% Health when Jolee revives JKR, then Hermit Yoda gives him Master’s Training calling JKR and the other three to all attack and kill the Geonosian Spy. Now just the two Geo Soldiers left, I land a stun on one of them after a failed attempt to remove TM, and finally eliminate him to leave me with a 5 on 1 battle. I am able to stun the Geo Soldier and move on with ease.
The third wave of enemies are a B2, a B1, a Command Battle Droid (Elite), a Droideka and a Geo Soldier. B2 is my focus and the combination of Master’s Training and GMY attacks takes him out without a single attack on me. A barrage of attacks kills Bastila, but I stun Droideka and have targeted him with JKR. I lose GMY as well, but Jolee saves the day, for now at least, with a revive. I lose Bastila again but take out Droideka leaving the B1, Geo Soldier and Elite Command Battle Droid (CBD). I remove all stacks from the B1 and remove TM from the Geo Soldier, but lose JKR in the process. The AT-TE helps a bit, then GMY’s multi-attacks finish off the Geo Soldier. Jolee revives all Jedi, GMY passes buffs to them all and I have a favorable 5 versus 1 against the CBD. It ends as hoped and I am on to the 4th wave of enemies.
The fourth and final wave of enemies come out firing before I can do anything, and GMY is dead, Bastila and JKR are in the red and Jolee is at ~50% Health. I try to hit the B2 and even get Jolee to revive again, but Bastila is dead immediately after. The stacks of Droid Battalion are just too much in this wave as I am unable to make any progress and die with 1,014,750 Territory Points and a 3 out of 4.
Phase 2 (South) Jedi Combat Mission Battle Notes:
Here is what my roster looks like now:
- Jedi Knight Revan – now 29,844 power – 7-stars – Gear 13, Relic 3 – Six 6-dot mods (Offense & CC sets) – all abilities maxed, 293 speed
- Bastila Shan – now 24,496 power – 7-stars – Gear 13, Relic 2 – Five 6-dot mods & 1 Gold, 5-dot mod (Offense & Health sets) – all abilities maxed, 252 speed
- Grand Master Yoda – no change
- Jolee Bindo – no change
- Hermit Yoda – now 24,397 power – 7-stars – Gear 13, Relic 1 – Two 6-dot mods, four gold, 5-dot mods (Speed & Health sets) – all abilities maxed, 305 speed
01.19.20 – Following the same pattern as before, I target the B2 first, then the B1, followed by trying to remove the Geonosian Spies. I got a little sloppy, something having a Relic 7 Jolee Bindo allows me to get away with, but I am able to recover and advance.
The second wave is tougher than expected with two Sniper Droids and a Geo Spy that all hit quite hard. Note that the Sniper Droids were not in this battle a month ago… After removing the B2 I start working on the Sniper Droids, but take a couple of big hits. I lose Bastila and try to revive her but cannot – I am not sure why. I try to time another revive and cannot, then end the wave without her which really derails my entire battle.
The third wave is a cluster as losing Bastila threw everything off. I cannot revive Bastila and the timing and abilities are a mess. I die quickly with 704k Territory Points to show for my efforts.
Phase 2 (South) Jedi Combat Mission Battle Notes:
Back after months of not updating this mission, here is what my roster looks like now:
- Jedi Knight Revan – now 33,411 power – 7-stars – Gear 13, Relic 6 – Six 6-dot mods (Offense & CC sets) – all abilities maxed, 292 speed
- Jedi Knight Luke Skywalker – now 30,385 power – 7-stars – Gear 13, Relic 6 – Five 6-dot mods & 1 Gold, 5-dot mod (Offense & Health sets) – all abilities maxed, 153 speed, 11,079 damage, 58.39% CC, 192% CD
- Grand Master Yoda – 25,399 power – 7-stars – Gear 13, Relic 4 – Five 6-dot mods & 1 Gold, 5-dot mod (CD & CC sets) – all abilities maxed (except leader ability), 282 speed
- Jolee Bindo – 30,087 power – Gear 13, Relic 7 – 7-stars – Five 6-dot mods & 1 Gold, 5-dot mods (Health, Defense & Tenacity sets) – all abilities maxed, 234 speed
- Hermit Yoda – now 27,850 power – 7-stars – Gear 13, Relic 4 – Six 6-dot mods (Speed & Health sets) – all abilities maxed, 312 speed09.15.20 – Hermit Yoda goes first and applies Master’s Training to Jolee and we are started. JKR is up next, uses the AoE to pass the turn to JKLS and after the stun I take out the B2 and B1 in succession before the Jedi revive from JKR’s leadership is used when he takes too many hits. Now the spies are exposed but JKLS has to dispel the MagnaGuard to get to them. This goes on until all enemies are defeated using JKLS to dispel when needed.
The second wave of enemies features a B2, a BX Commando Droid, two Geo Soldiers and a Spy. The B2 goes down before they can attack as JKLS stuns the group, then the Commando Droid follows. Once the Spy is no longer in stealth I gang up on him and leave the two Geo Soldiers for last, finishing them with ease.
The third wave has a Sniper Droid which gets to be the target of the multi-attack from Master’s Training, but a barrage of hits from the enemies after this hurt my squad. The full strength AT-TE follows, but the Sniper Droid continues to survive much longer than he should. A Jolee revive brings back JKR, but not GMY, leaving me down a man as I work on the B1 with no success. I switch focus to the Geo Soldier, and after losing JKR again and reviving him again, finally take the Soldier out. JKR marks the Command Battle Droid as I look to finish these final two off and advance. The B1 will not allow this to be easy and continues to heal the Command Droid faster than I can hit him, so I switch focus again but I have allowed him too many stacks and I am treading water. Only after JKLS stuns them both and JKR targets the Command Droid can I penetrate the defense enough to finally eliminate the enemy leader, leaving the B1 with 150 stacks on him. I then spam JKR and JKLS together to take him out and head into the fourth wave, my expected demise.
The fourth wave has General Kalani, who I mark immediately and look to eliminate. The special changes from Kalani do not allow for ganging up on B1 or B2 Battle Droids, which makes this quite difficult. I continue to focus on Kalani despite losing and reviving JKR multiple times, and kill Kalani with JKLS just after losing Jolee, thus ending my chances. Three waves is all I can muster, along with the 1,014,750 Territory Points that come with it.
