Cal Kestis is off on another journey and this time we head to the Shattered Moon of Koboh to look into a base here that Dagan Gera is recorded as having visited in the past in the new Jedi archives.
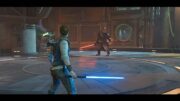
As you navigate the Shattered Moon at the start, from the lower section, jump around to the left side and there is a grappling hook spot to allow you to progress. Learning to use the blaster can be a challenge and in one battle with the Bedlam Raiders on the Shattered Moon we abandoned decided to abandon the gun altogether. The camera also seems to knock and go awry at times in the battles with the Bedlam Raider, this game’s Haxion Brood enemy, and after defeating a couple of the Raiders you enter a room with more Raiders and several B1 Battle Droids. This room proves to be pretty difficult, but killing the B1 droids in their recharging stations and fighting the Raiders individually (when possible) helps. We lured the enemies into the entrance hallway to group them together and the double-bladed lightsaber.
After the battles with the Bedlam Raiders you progress into another room and face a reprogramed IG-100 MagnaGuard. After defeating the Magnaguard it is time to climb and then use a zipline where avoiding the electrical current reminds us of a Toy Story 3 game the kids played on the Wii when they were younger. After unlocking a shortcut, we head to the lower levels to explore.
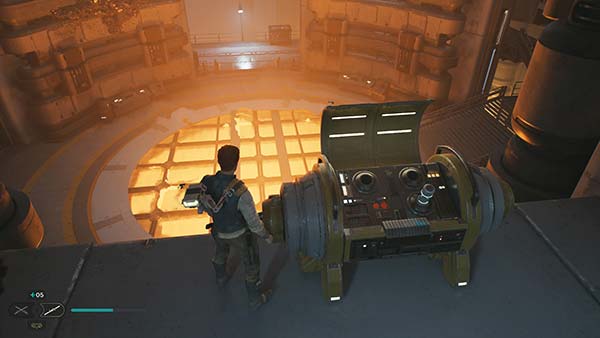 After a trio of zip lines that result in tricky wall runs you arrive at the Assembly Staging area (pictured) you grapple up and go along a zip line and Jedi flip over the sparks, you will find another Stim upgrade.
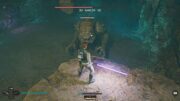
The entire Shattered Moon is a lot of dodging electrical currents via jumps, flips and hanging while also navigating the Bedlam Raider droids.
When you get to the Superstructure Fabricators you encounter Drya Thornne, a lightsaber-weilding spaceman who uses a stealth approach like the MCU’s Ghost in Ant-Man and the Wasp. While we tend to like the dual wield sabers in 1v1 battles, this battle seems to work well with the double-bladed lightsaber. After the win Cal picks up the lightsaber he forges the Kyle Ren style cross guard lightsaber which is slower and more powerful than a standard lightsaber, and you get to test it out in combat with reprogrammed droids and a Bedlam Raider shortly after.
From here we head back to the Mantis and head to Koboh.
Back on the Shattered Moon after finishing the the Search for Compass on Koboh quest, we are here to Locate Rayvis on the Shattered Moon.
Locate Rayvis on the Shattered Moon
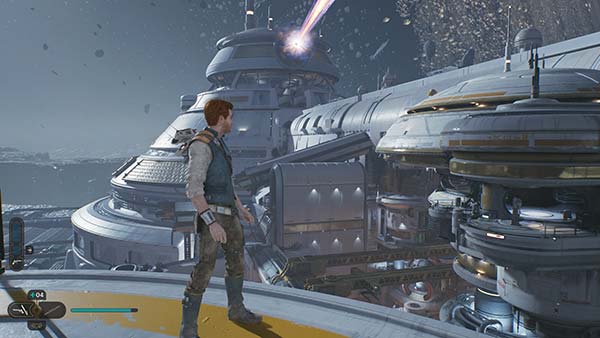
The return to the Shattered Moon allows Cal to show off his new moves jumping, dashing and using the Force Lift and Slam abilities. You head toward the crazy big laser cannon (Forest Array) and navigate around the panels that go up and down. Then we have to go through the Forest Array itself and explore the area. When you get to the landing with the laser firing and a ton of droids, Force push droids and Bedlam Raiders into the beam to for an achievement. Navigate around and after Greez contacts you the parkour is crazy. We work around the the Array and again go through it, using green laser gates to stop between blasts. More grappling and climbing and an elevator takes you to the top and to a meditation circle.
You enter the Republic Research Tower and Rayvis continues his PA system lectures and you fight more Bedlam Raiders as you work your way to the Control Tower. On the way you have to find an orb and place it in a laser to burn off the Koboh matter, but the orb you find is stuck behind glass. The key to this puzzle is to throw the ball onto the ramps inside the same room and as run to the other room and Force pull it as it rolls down the ramp. Then we can melt the Koboh Matter and connect the burning matter with BD’a Koboh grinder to connect the flame to allow you to progress. You then get to unlock the ability to slice Droidekas.
Continue forward and you get to a room where a cutscene takes us to a memory of Santari and Dagan and we learn what happened to the #OneArmedJedi. We get some High Republic tech to enhance Cal’s ascension cable and we take a moment to work on the lightsaber and take a break from gameplay.
The new ascension cable/grapple is used immediately and the unrealistic jumps and acrobatics become more unrealistic. Some crazy jumps and grappling get us to one of the red terminal/chests/crates that we cannot yet unlock, and we eventually get to the control room where we face Rayvis. We learn more about the Rayvis & Dagan backstory as the battle nears.
Fighting Rayvis proves difficult thanks to range and power, but the cross guard lightsaber really packs a punch in this battle. After it seems that you have him beat you have to do it all over again, only this time with his arm exposed and stuff growing out of him. The slows really help you get stims used and get attacks in as well and the cross guard lightsaber feels like a real key due to the punch it packs. Our details battle with Rayvis on Jedi Grand Master difficulty will be added soon.
After the battle you get another Perk and head back to the Mantis as it seems we are headed back to Koboh.
By ljcool110 & Mustafar Nathan